
Constraint Layout in Jetpack Compose: Create complex and responsive android layouts on the fly.
7 September, 2022
6
6
0
Contributors

Introduction
•
Building a UI is one of the essential yet mandatory things for android applications.
•
While working with XML, we used to build layouts with a Linear Layout, Relative Layout, Frame Layout, and Constraint Layout. In general, we prefer Constraint Layout over others as it gives you the full flexibility to build responsive yet complex layouts.
Note: This blog will NOT cover the concept of constraint layout but will cover how you can implement it in Jetpack Compose.
Fundamentals first!
•
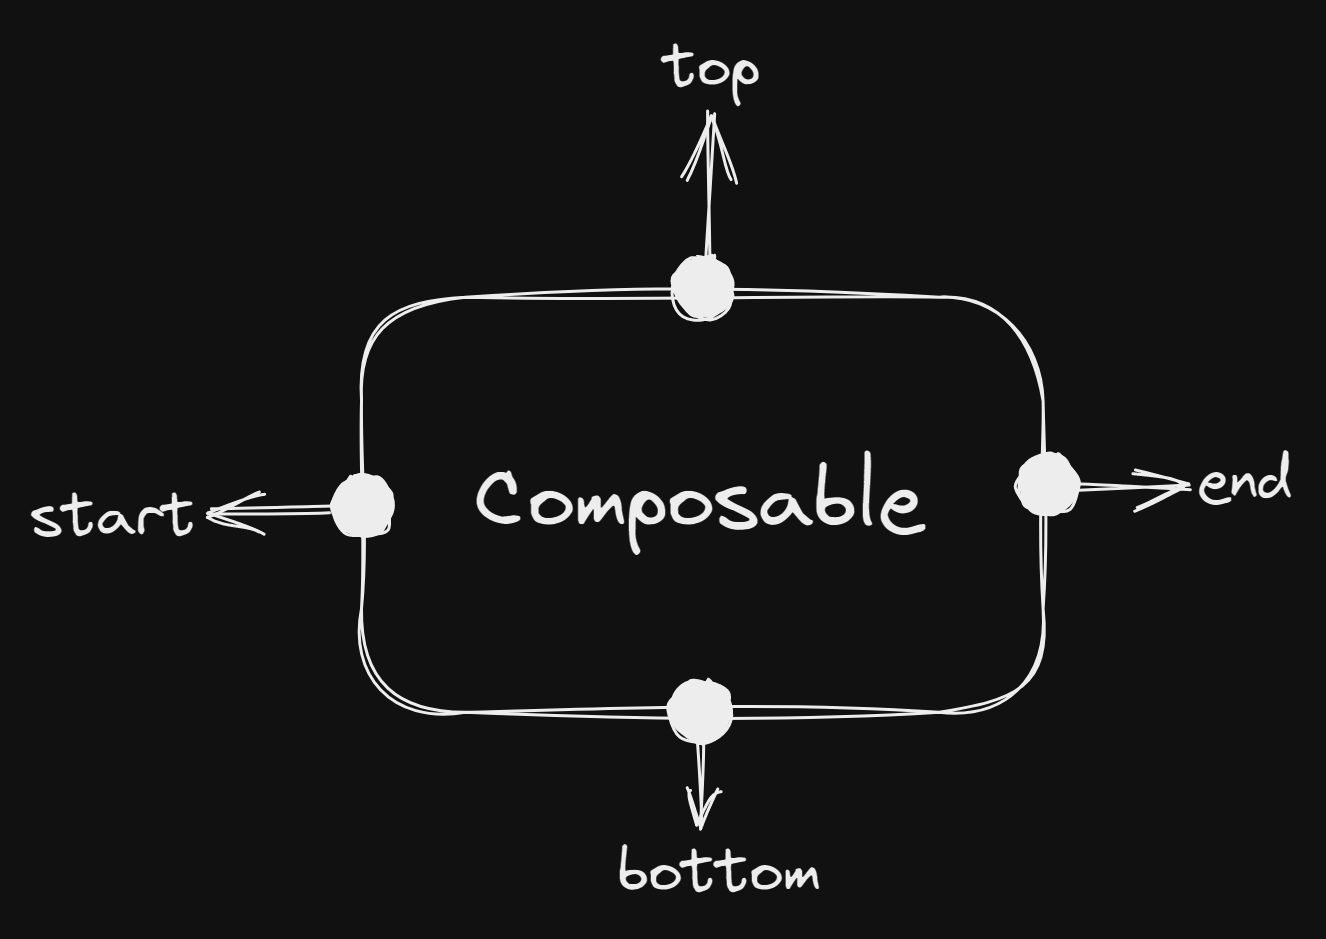
start = left-hand side of a composable
end = right-hand side of a composable
•
Do we really need a constraint layout every time?
•
•
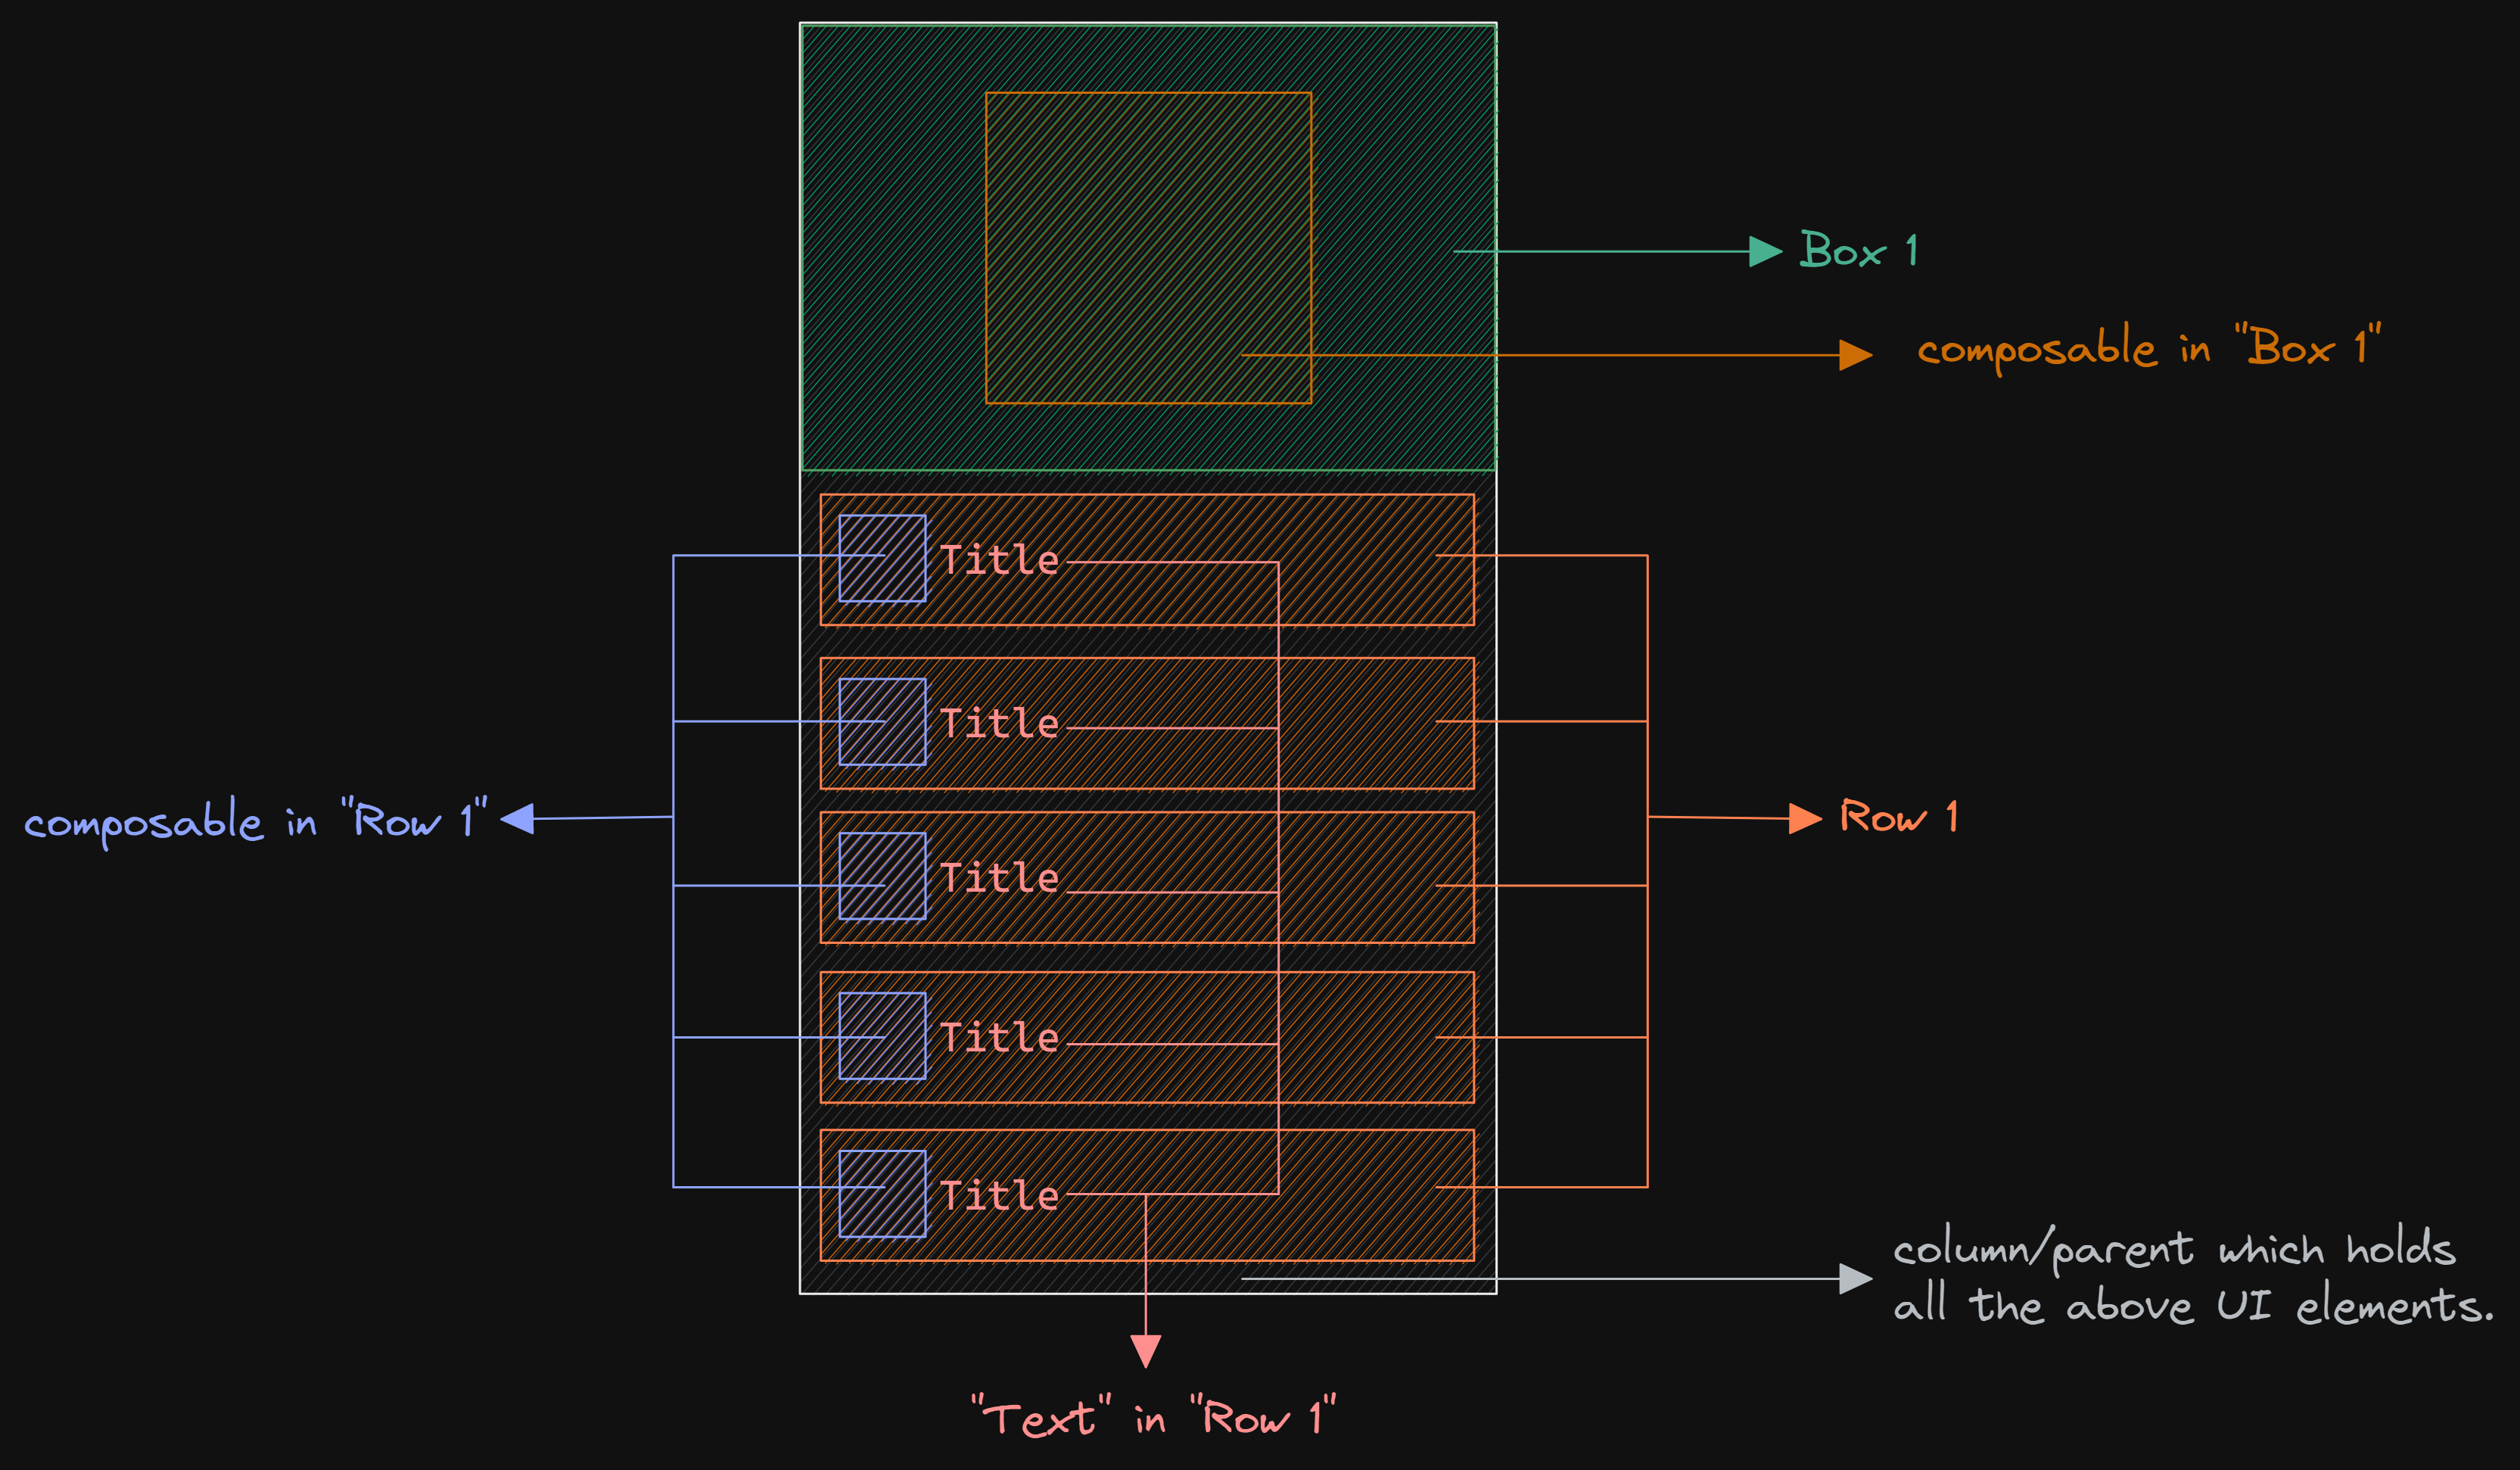
Building UI in Jetpack compose is pretty simpler than XML(in most cases). As you can see, we didn't use any sort of constraint layout here. We just used composables, rows, boxes, and so as per our UI requirement.
•
The point over here is that we don't need to use a constraint layout every time we build a UI; we can build a pretty good UI even without a constraint layout in jetpack compose.
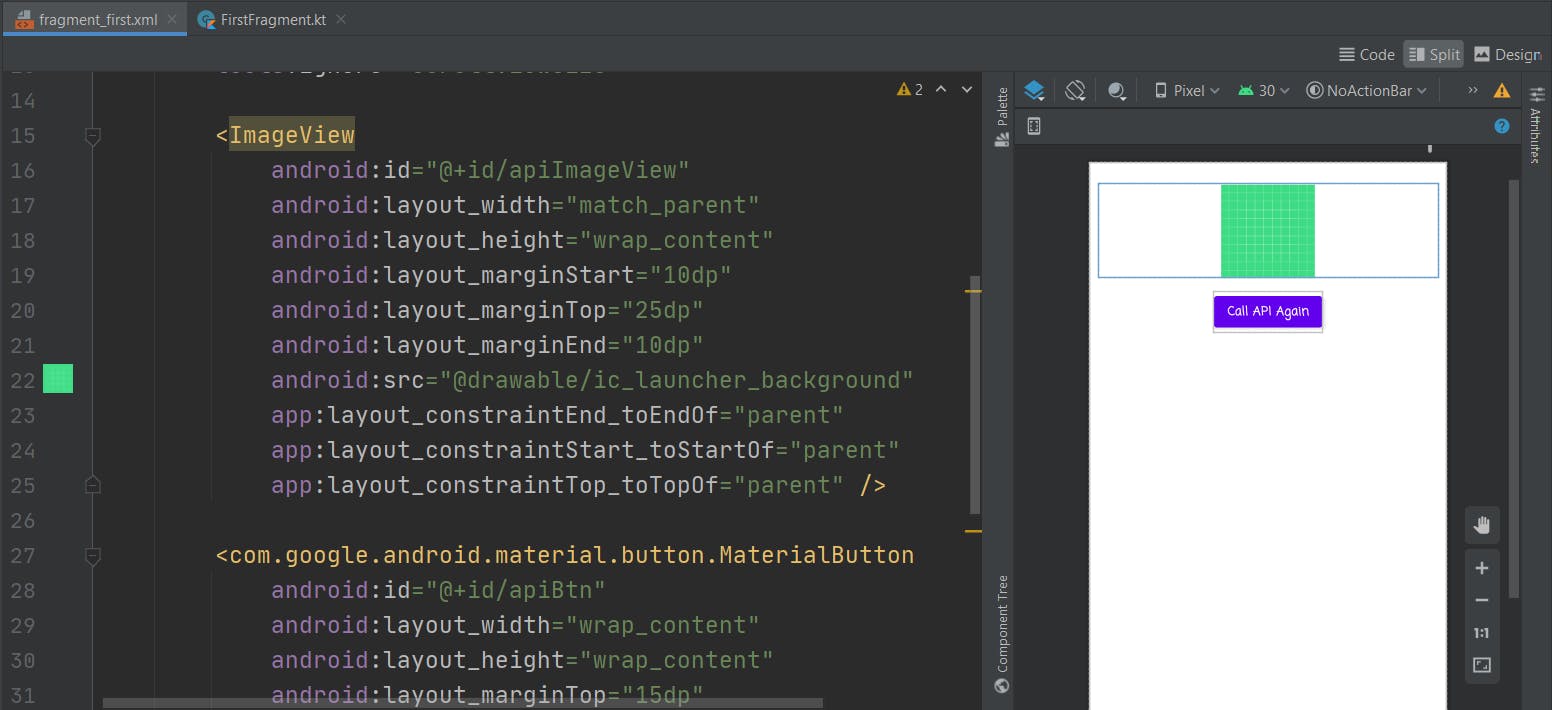
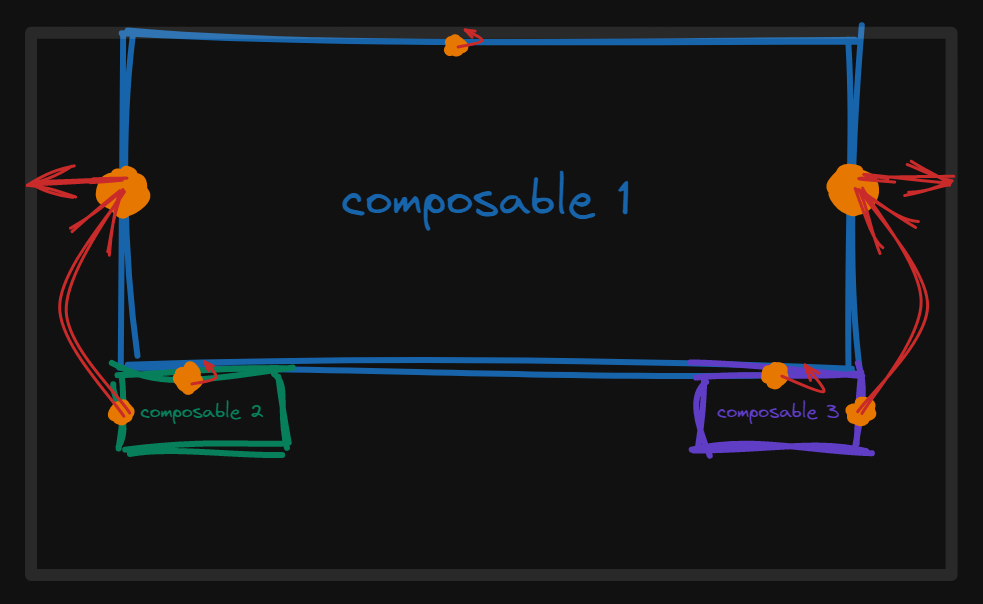
But what if we want to build a complex layout that includes the arranging of composables as we want, as below?
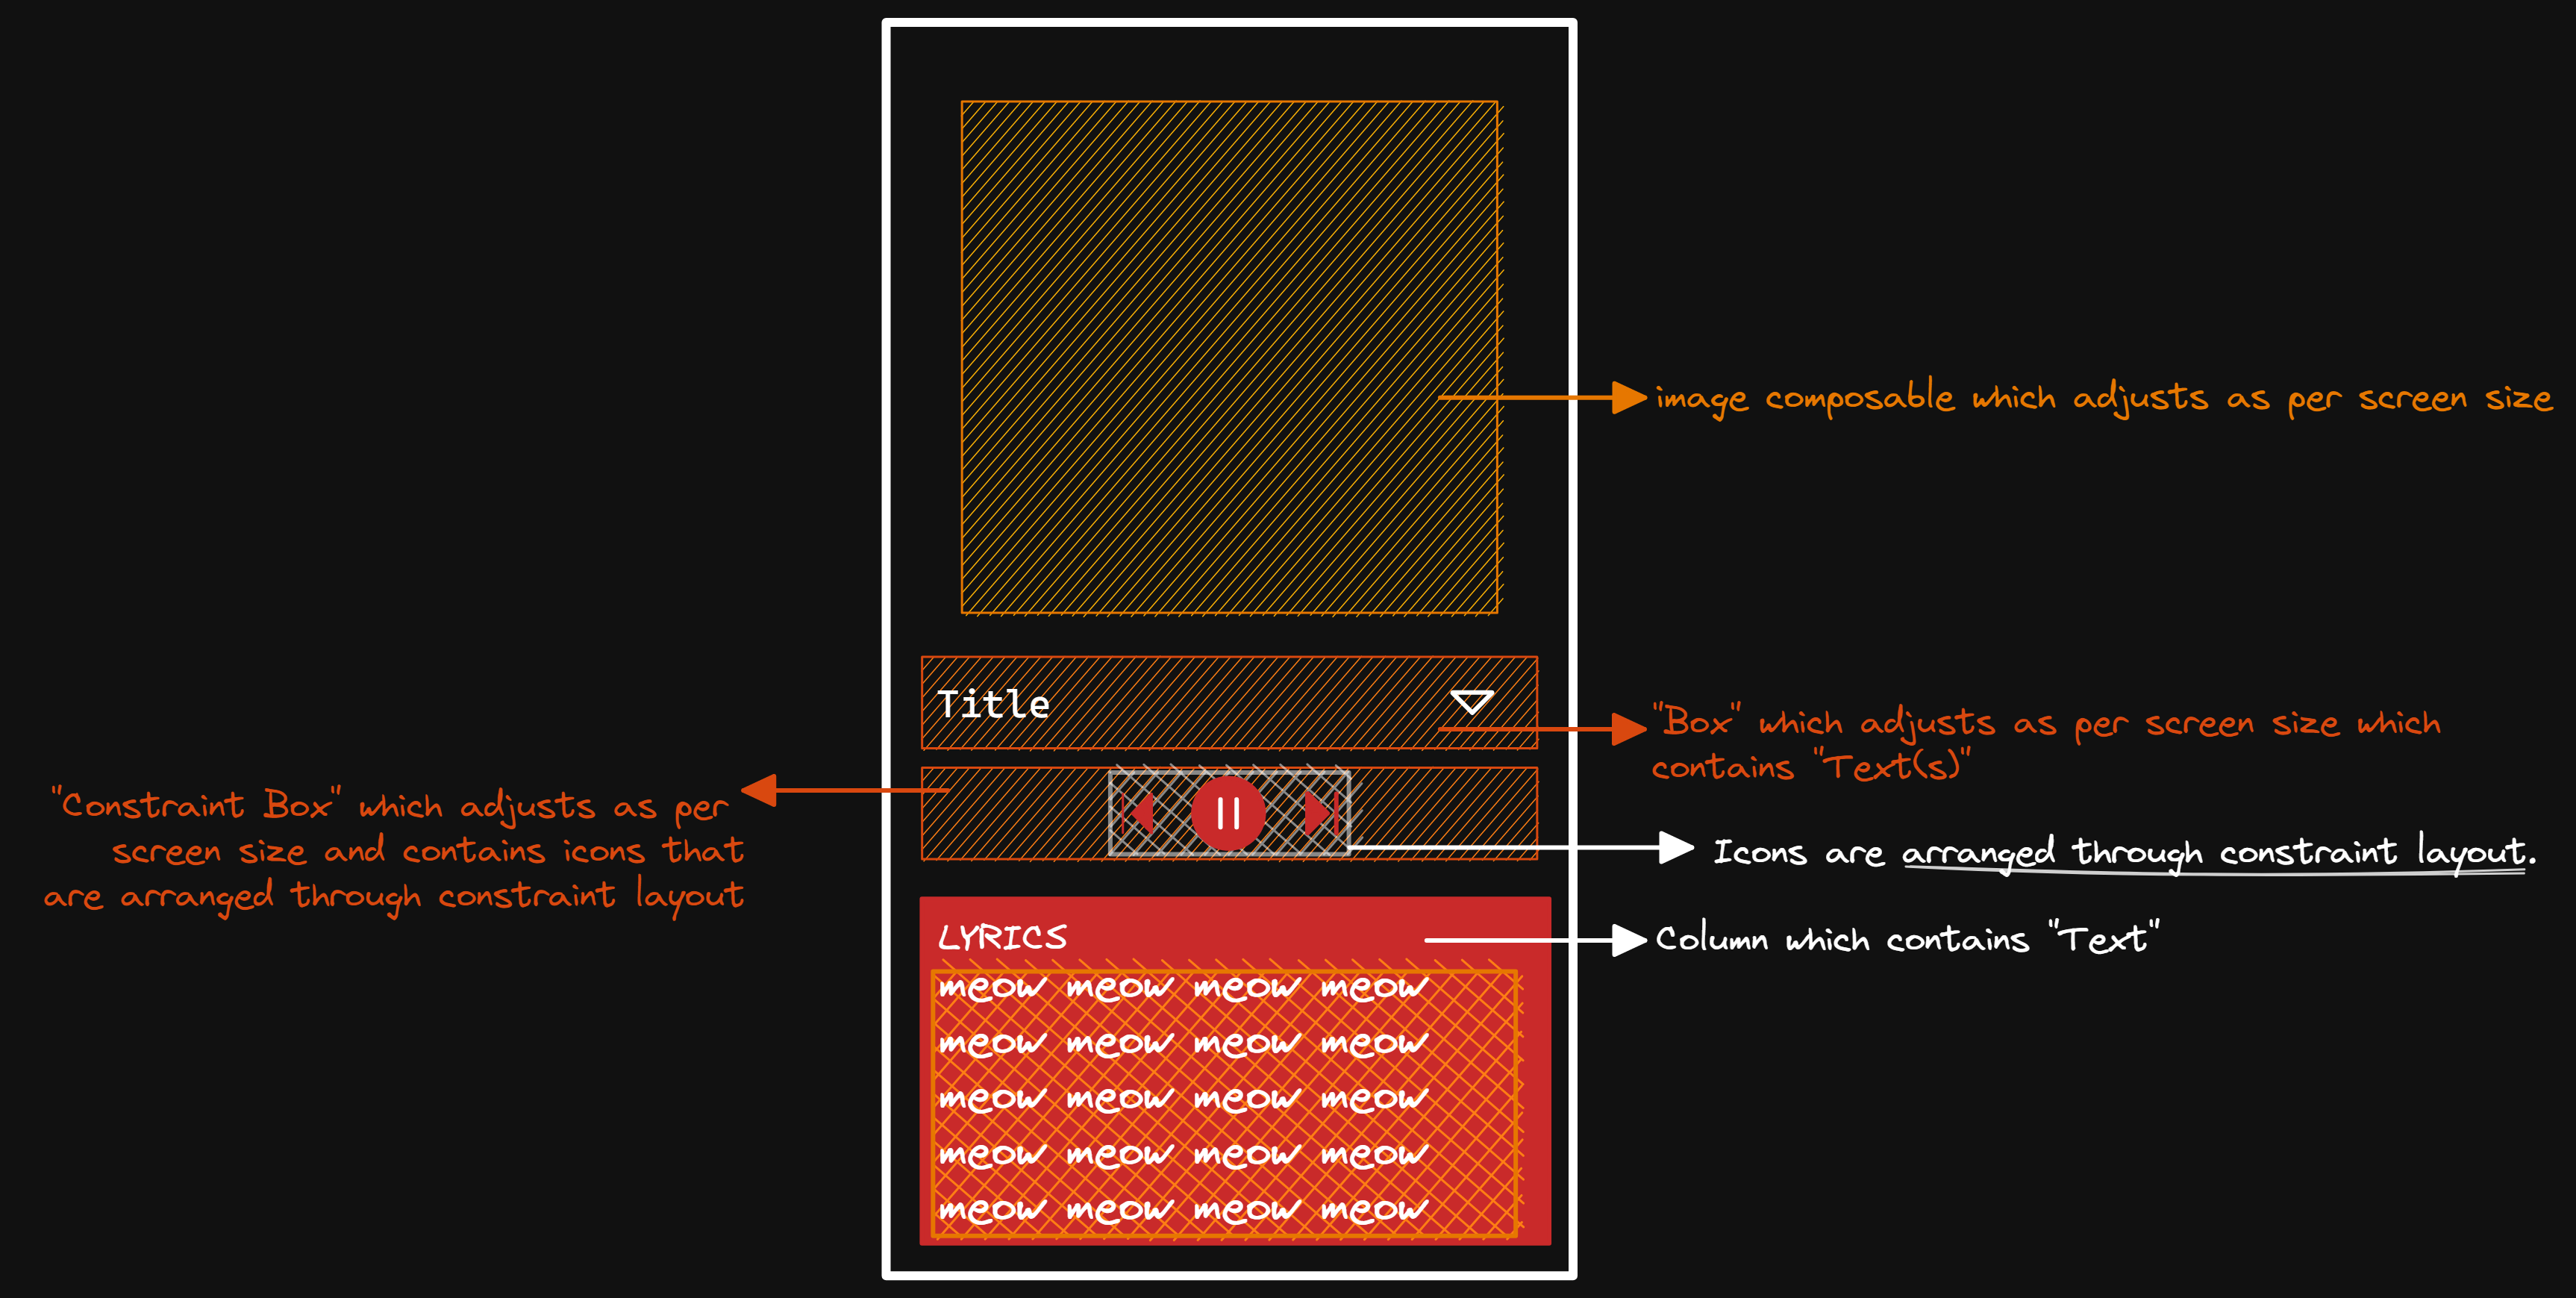
•
A ConstraintLayout is a layout that allows you to place composables relative to other composables on the screen. It is an alternative to using multiple nested rows, columns, boxes, and custom layout elements. ConstraintLayout is useful when implementing larger layouts with more complicated alignment requirements.
Implementation of Constraint Layout in Jetpack Compose
Dependencies
•
•
Implementation
•
•
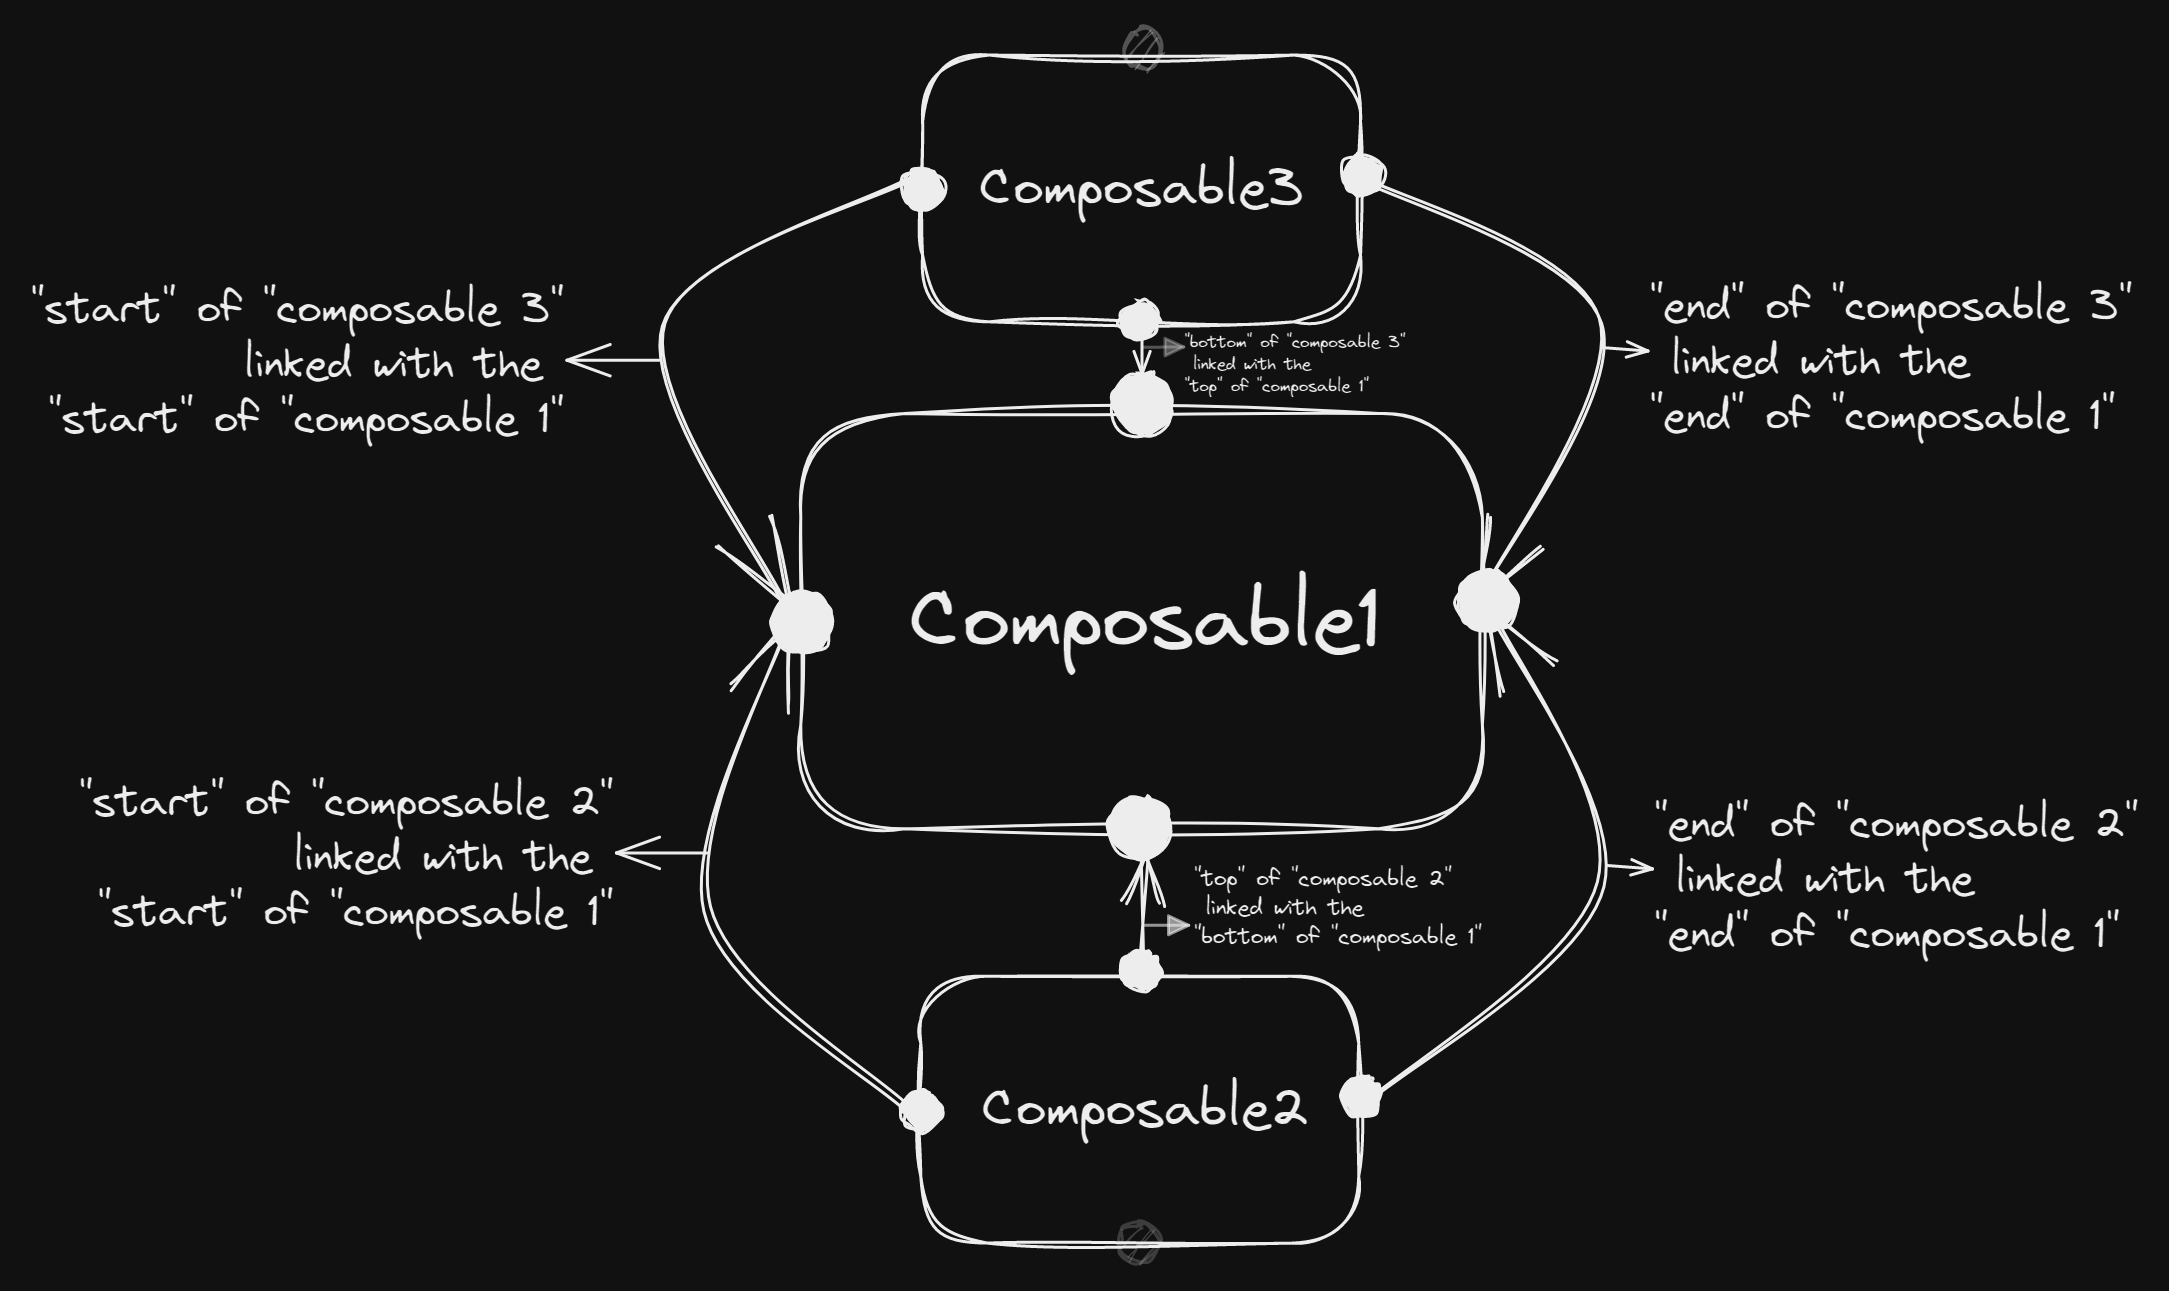
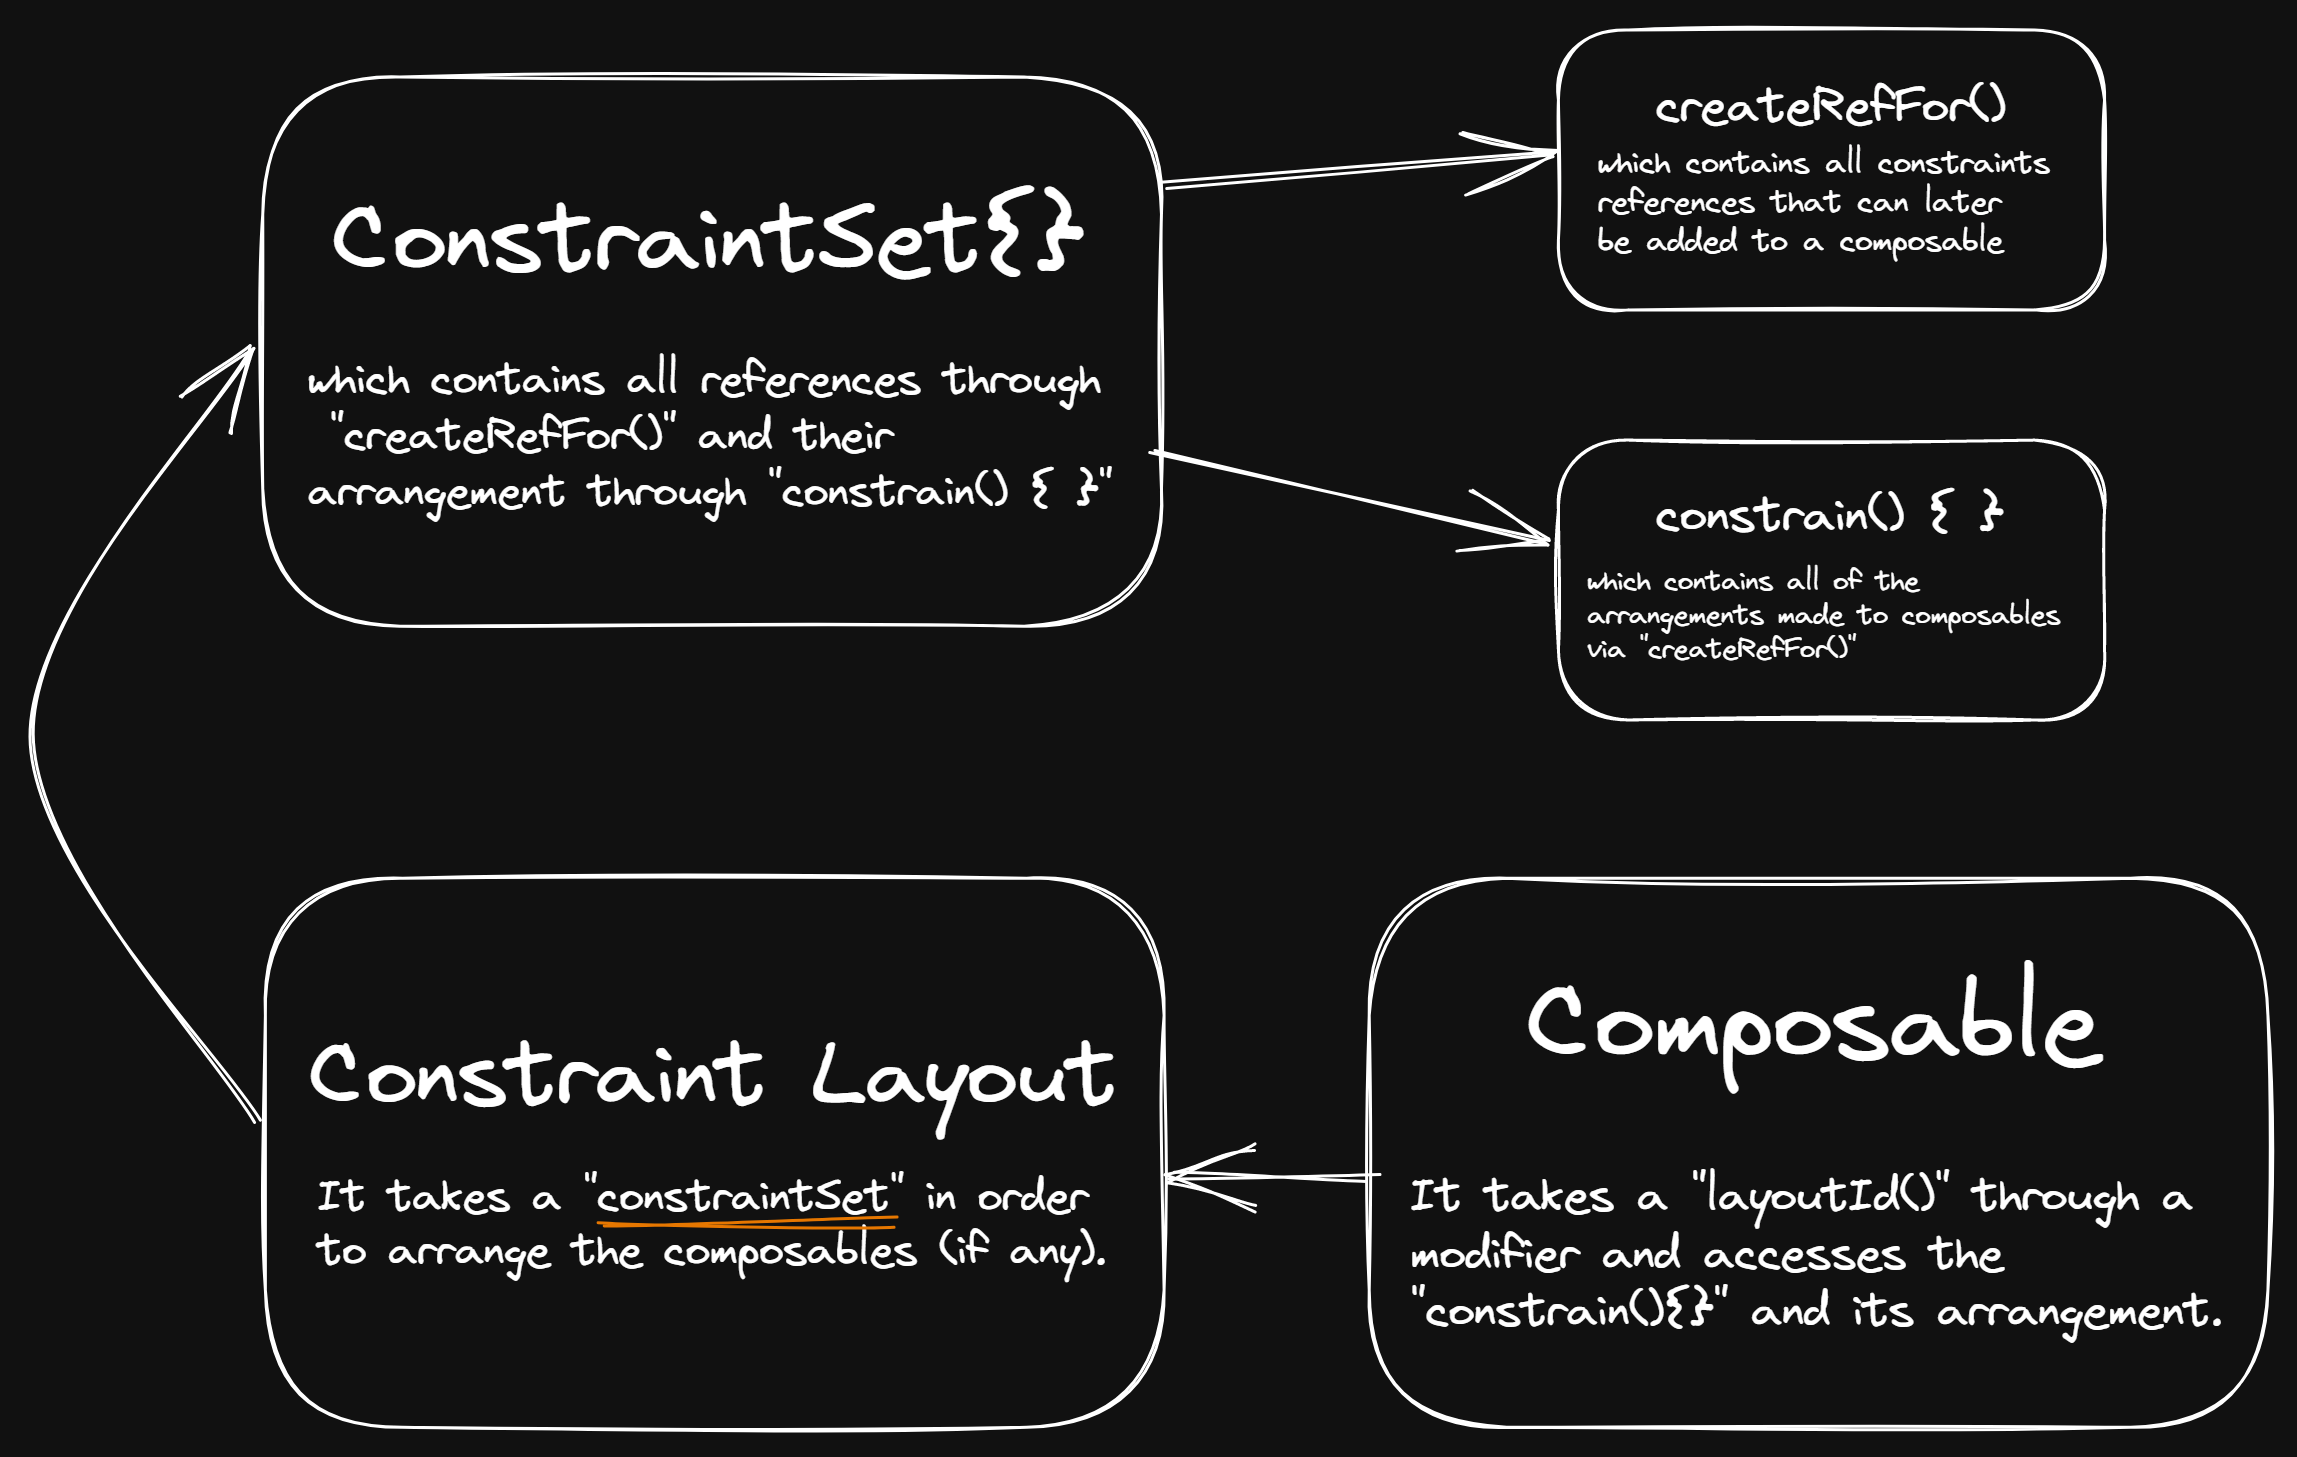
This is the sort of mapping that we'll use to implement constraint layout in jetpack compose:-
•
•
•
•
•
But it won't look like this, because we didn't add the references to the constraint layout and composables yet🤪
•
We can create a constraint layout by calling ConstraintLayout( ) { } and passing the constraintsSet variable to access the references we created in it.
•
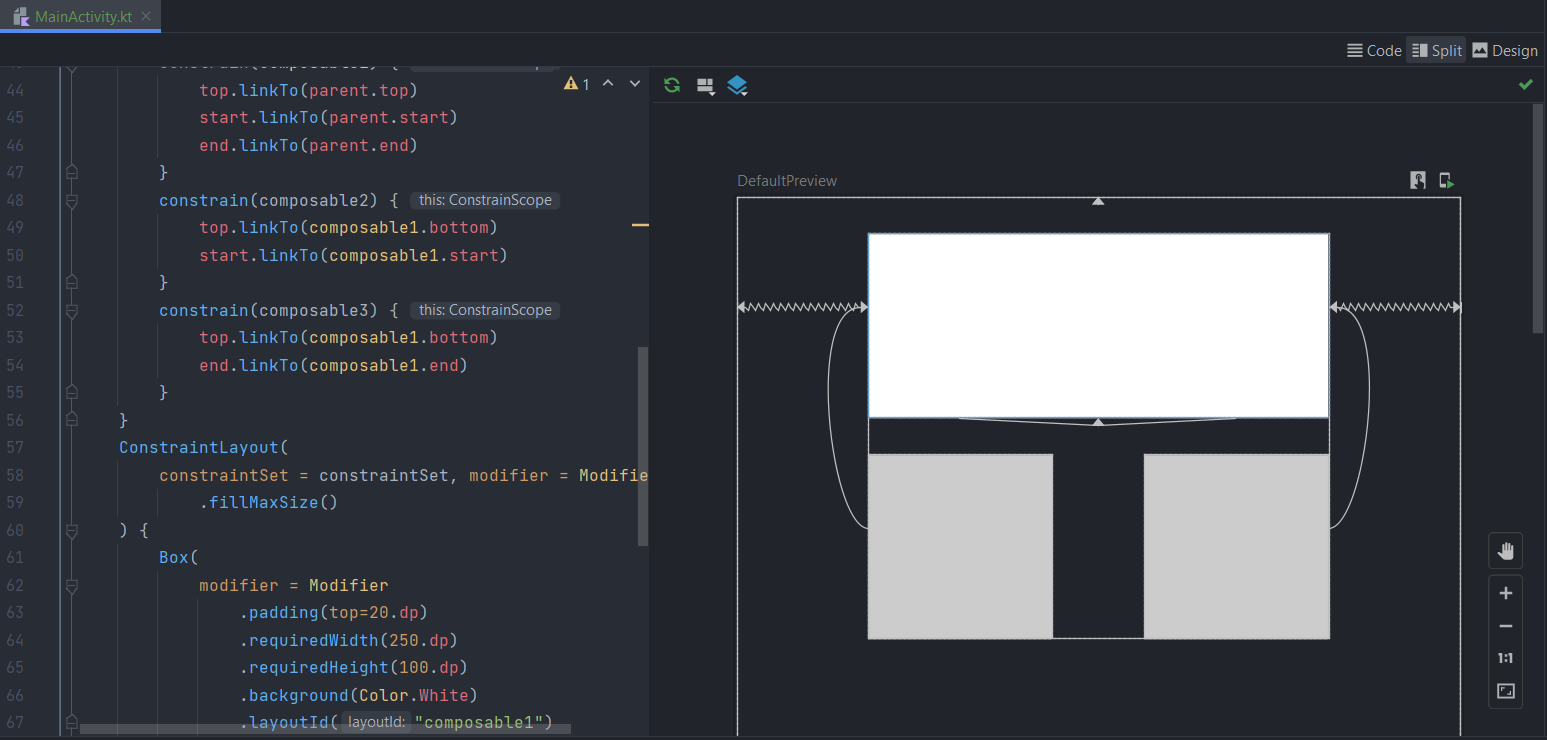
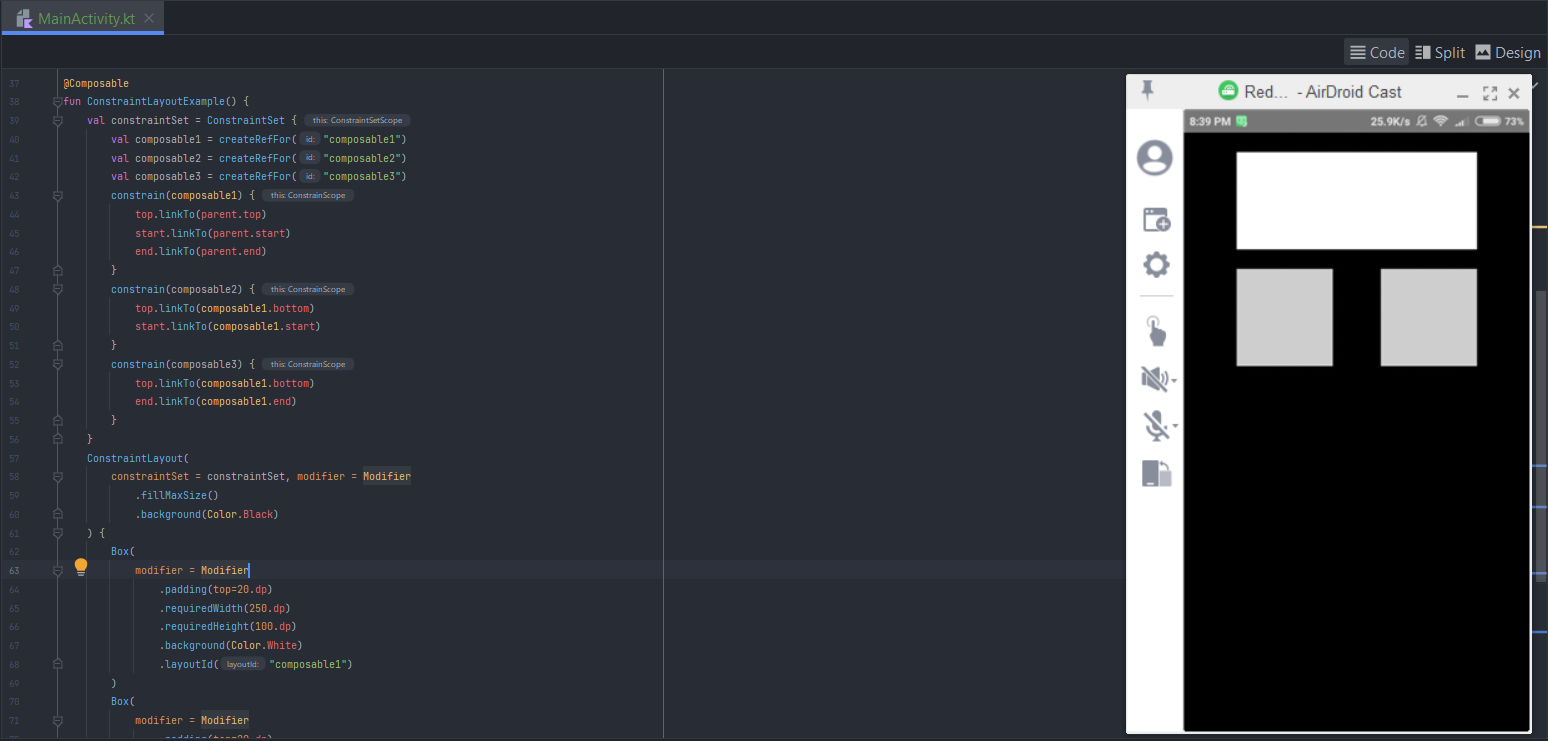
Your final code should look similar to this
It ended up like this😉
Compose Preview:-
Launching the application on a mobile device:-
•
BoxWithConstraints( ){ } rather than Box( ){ }, which also allows you to use ConstraintLayout( ){ }Practical Approach (example) while working with BoxWithConstraints( ) { }

Still, Confused? Then this is for you:
That's all for now. See you in the next one. Until then bye-bye👋